Features
- 14 Renko chart patterns: reversals and continuations, from Double Bottoms and Head & Shoulders to Flags, Triangles and Break & Retest setups, each switchable on or off.
- A signal when the pattern breaks out: the arrow appears when a brick closes through the breakout level, so you trade a finished pattern.
- No repainting: signals come from closed bricks and never move afterwards, so the history you scroll through is exactly what you would have seen live.
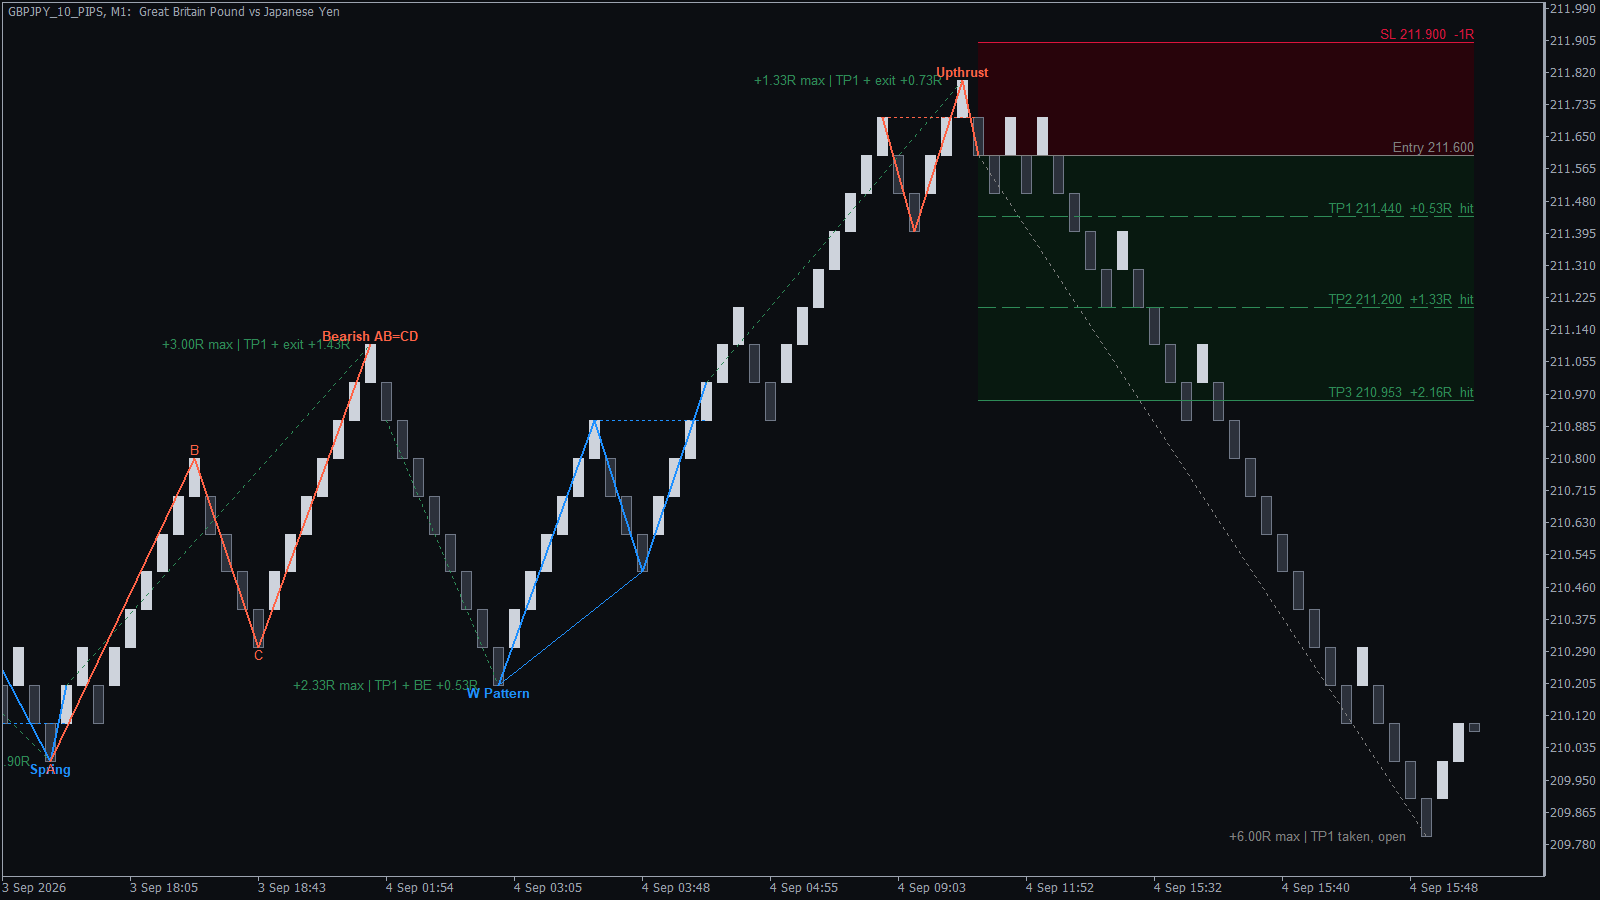
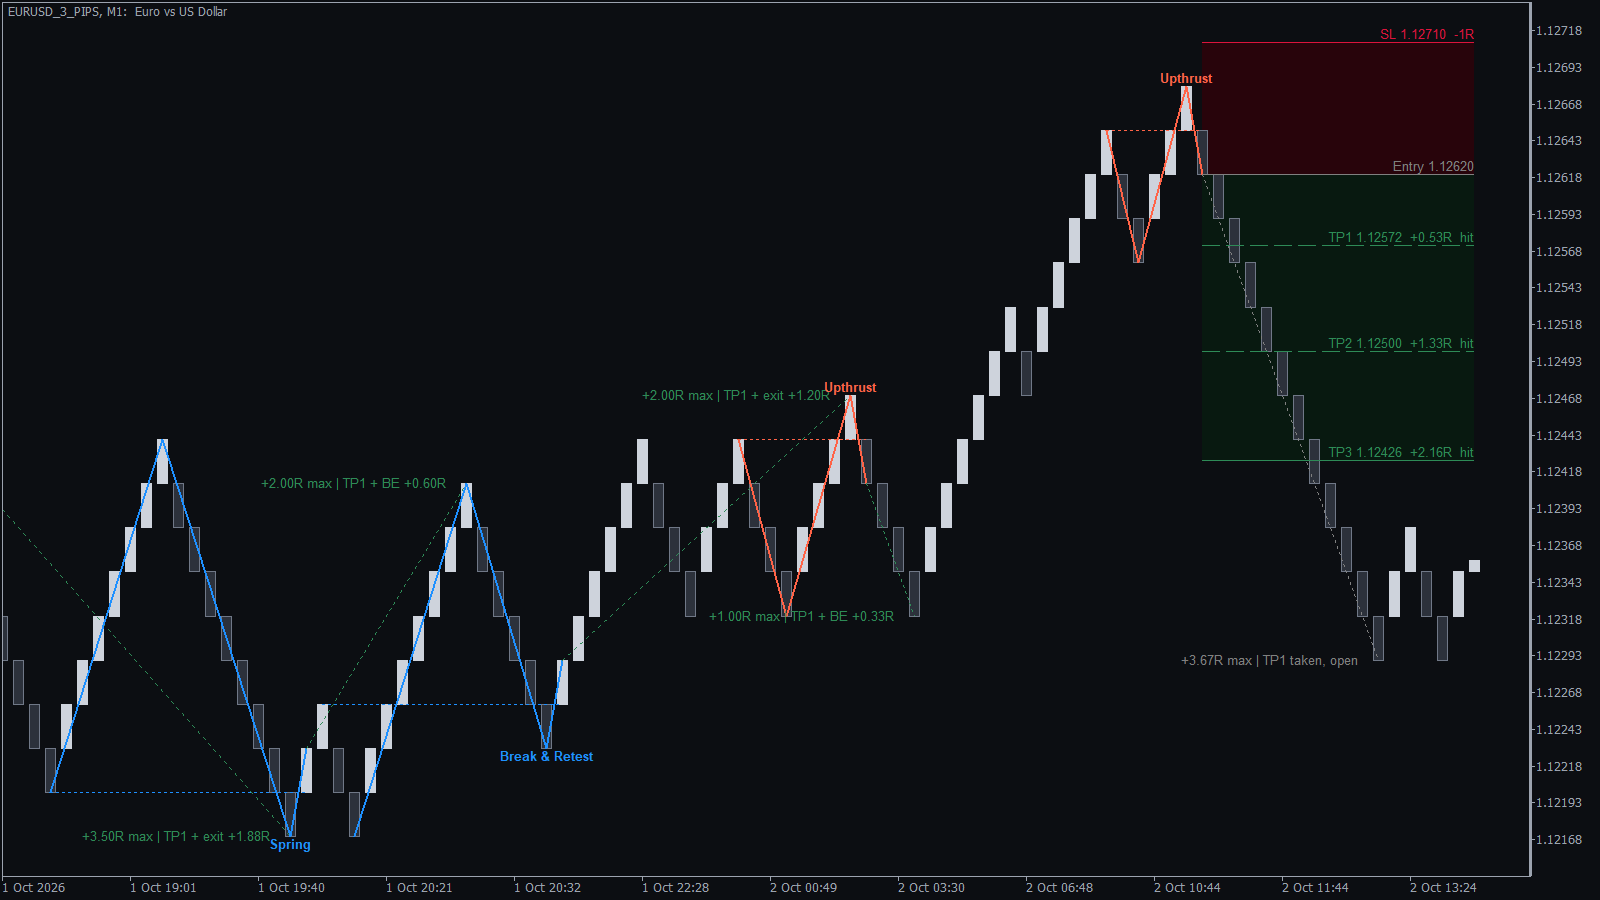
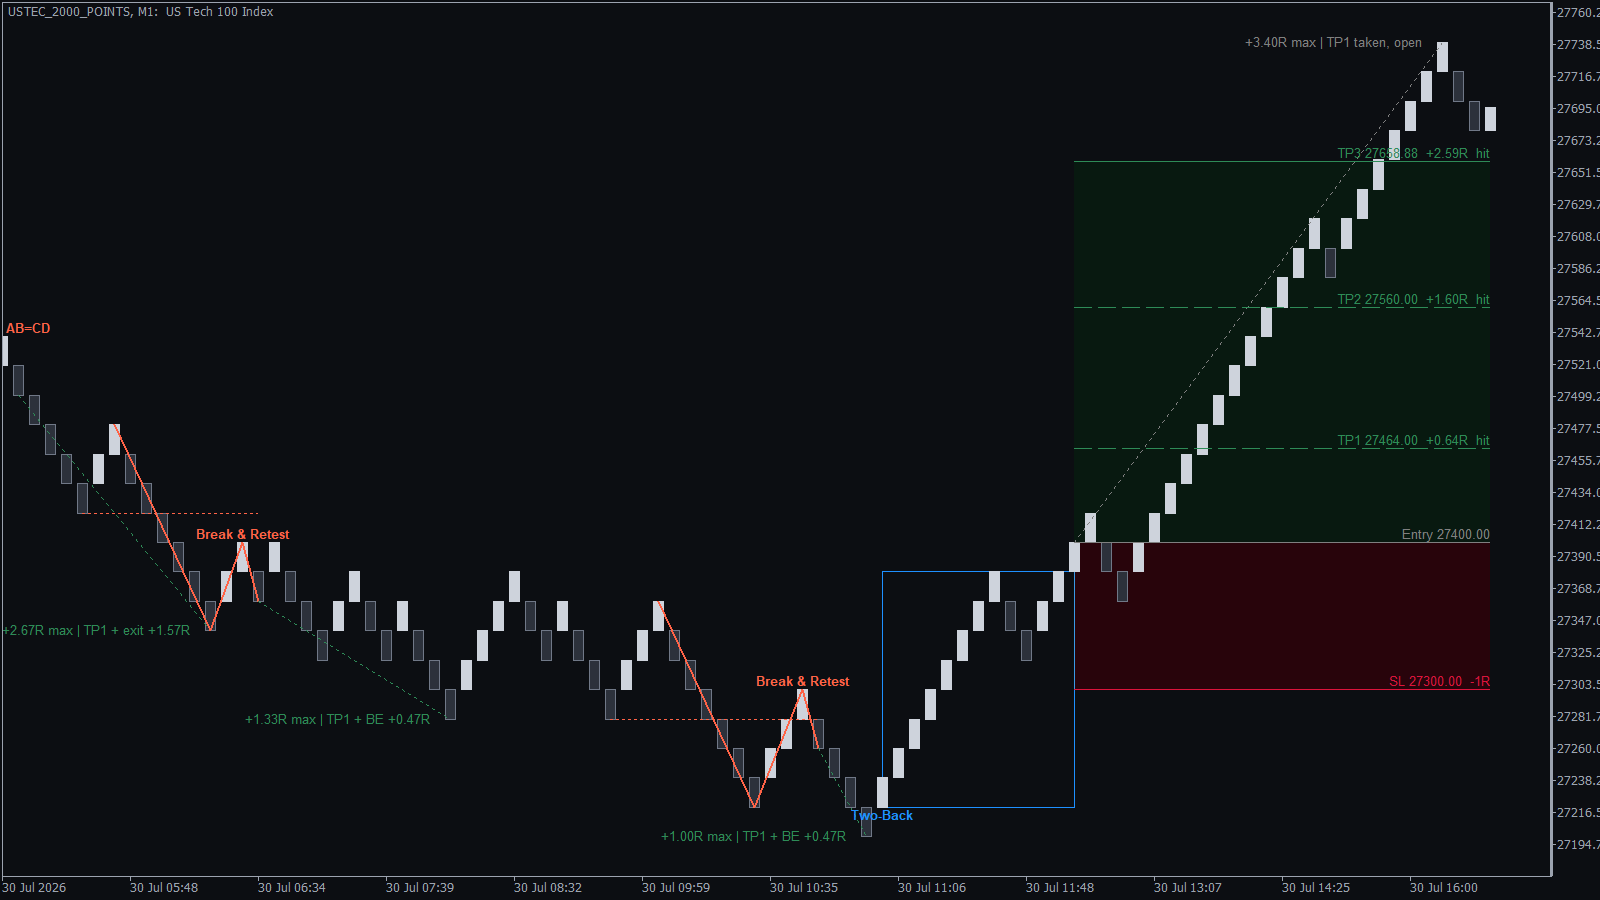
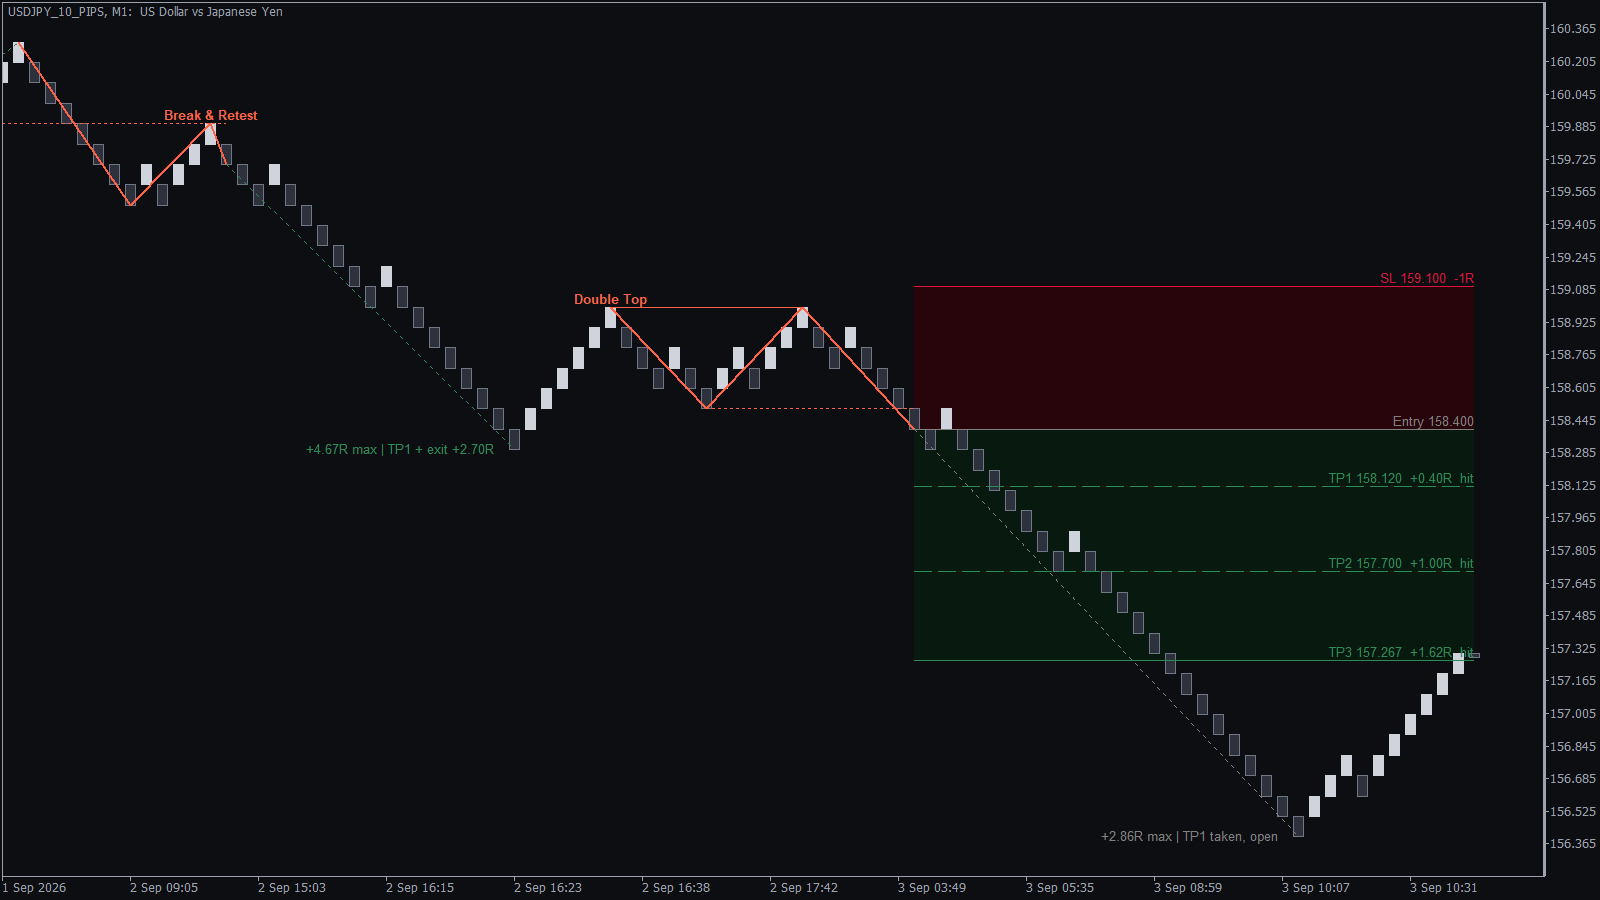
- A trade plan on the chart: the latest signal gets a box with the entry, a stop loss beyond the pattern and three targets, each with its price and its size in R, where 1R is your risk.
- The record of every signal: the dashboard follows each past signal to its stop loss or exit and shows the win rate, profit factor and average R.
- Keep the patterns that work on your symbol: the dashboard lists all 14 patterns with their own record. Click a pattern to switch it off, and the totals are recalculated.
- How every trade ended: a line on each past signal shows its best move and how the trade closed, so you can judge a pattern by scrolling back.
- Alerts with the full plan: popup, sound, email and push alerts give the pattern name, entry, stop loss and all three targets.
How the Renko Patterns Indicator Works
Open a Renko chart and attach the indicator. It measures the brick size by itself, and the dashboard shows "Renko OK" when it reads the chart correctly.
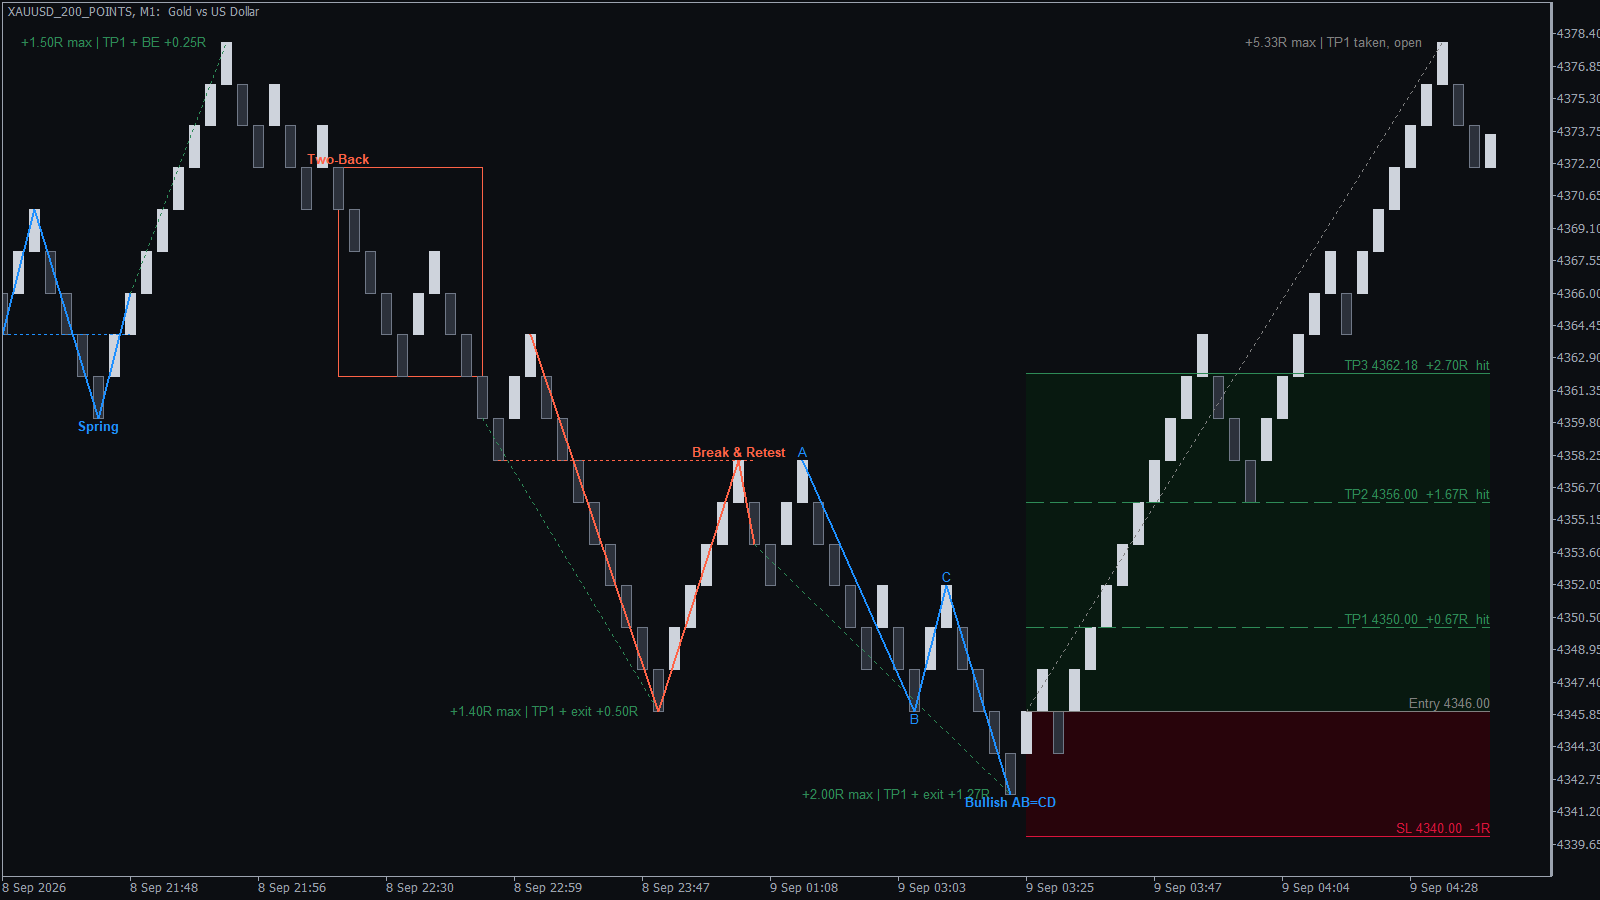
A blue arrow marks a buy and a red arrow marks a sell, with the name and the lines of the pattern drawn on the bricks. The latest signal shows the entry, the stop loss and the three targets in a box, and the dashboard tells you whether the trade is still running, has hit a target or was stopped.
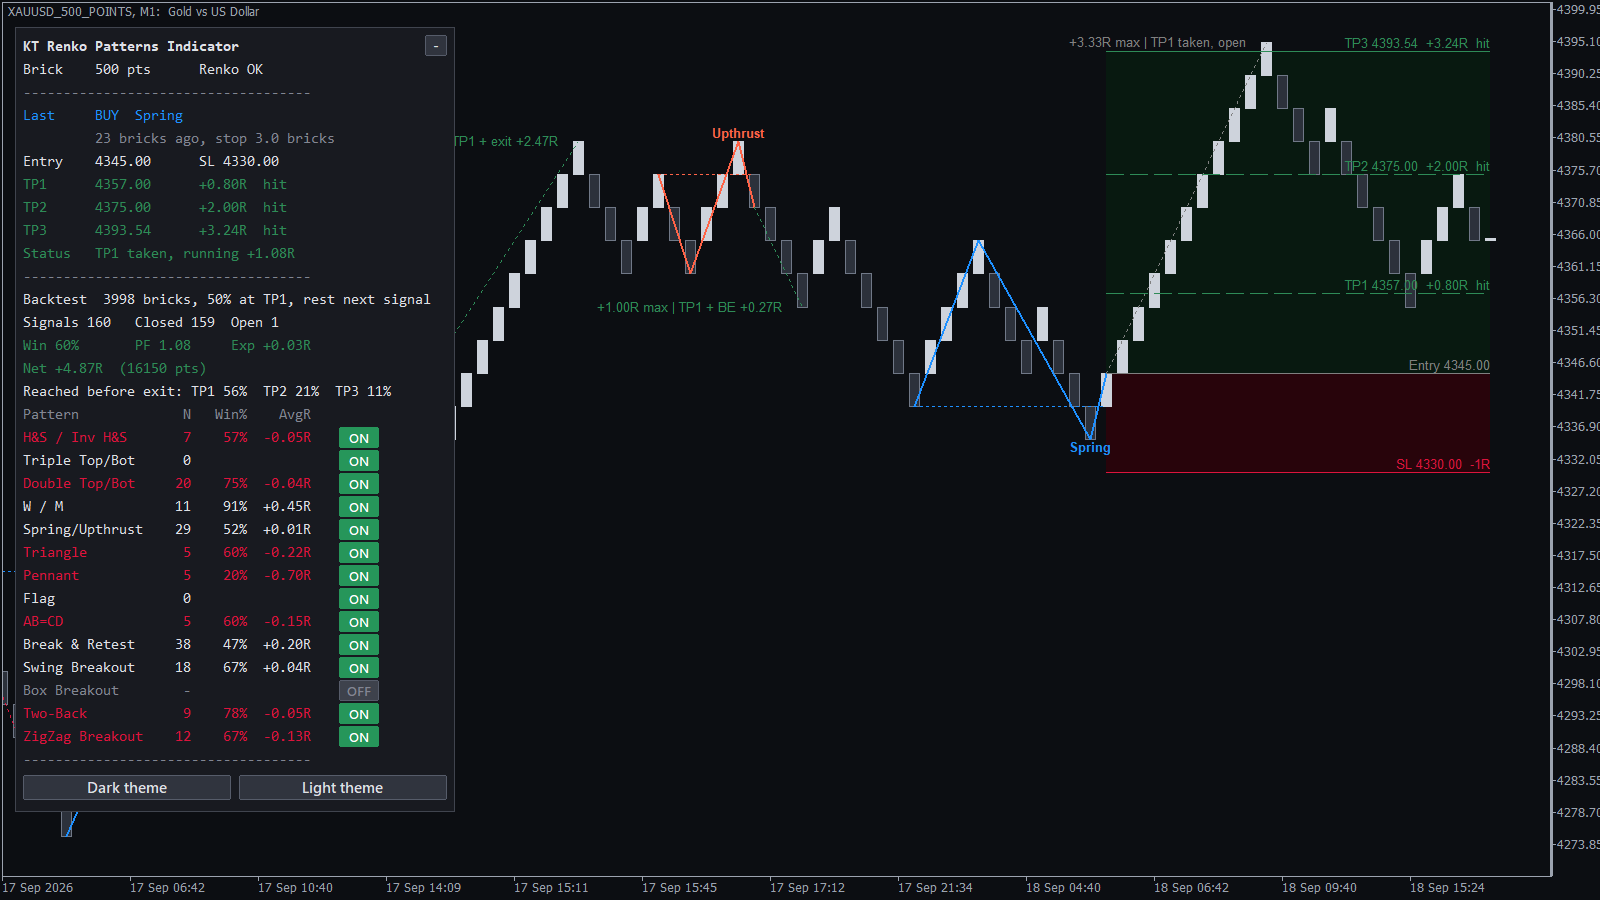
Patterns are easier to trust on a Renko chart because every brick is the same size and small moves do not print new bricks. Tops, bottoms and breakout levels show clean edges, which is why the indicator reads them brick by brick.
The 14 Renko Patterns the Indicator Finds
Reversal patterns
- Double Top and Double Bottom: two tests of the same level, and a signal when price breaks out the other way.
- Triple Top and Triple Bottom: three tests of the same level before the turn.
- Head & Shoulders and Inverse Head & Shoulders: a higher middle peak (or lower middle trough) between two shoulders, with a signal at the neckline break.
- W and M Patterns: the classic W bottom and M top, signalled at the break of the middle swing.
- Spring and Upthrust: a false break below support or above resistance that fails and turns back.
- AB=CD: two equal legs with a pullback between them, and a signal at the end of the second leg.
Continuation patterns
- Bull and Bear Flag: a strong move, a short pause against it, then the breakout in the direction of the move.
- Power Pennant: a strong move, then narrowing bricks, then the breakout.
- Ascending and Descending Triangle: a flat level tested again and again against rising lows or falling highs.
- Break & Retest: a level is broken, price comes back to test it, and the trend goes on.
- Swing Breakout: price breaks the last swing and the trend changes its structure.
- Two-Back: a short pullback of two bricks inside a trend.
- ZigZag Breakout: a run of alternating bricks that ends with a breakout.
- Box Breakout: a tight box of bricks and the breakout from it (off by default).
See these patterns on real charts in Renko Chart Patterns That Work.
Input Settings
| Input and default | What it does |
|---|
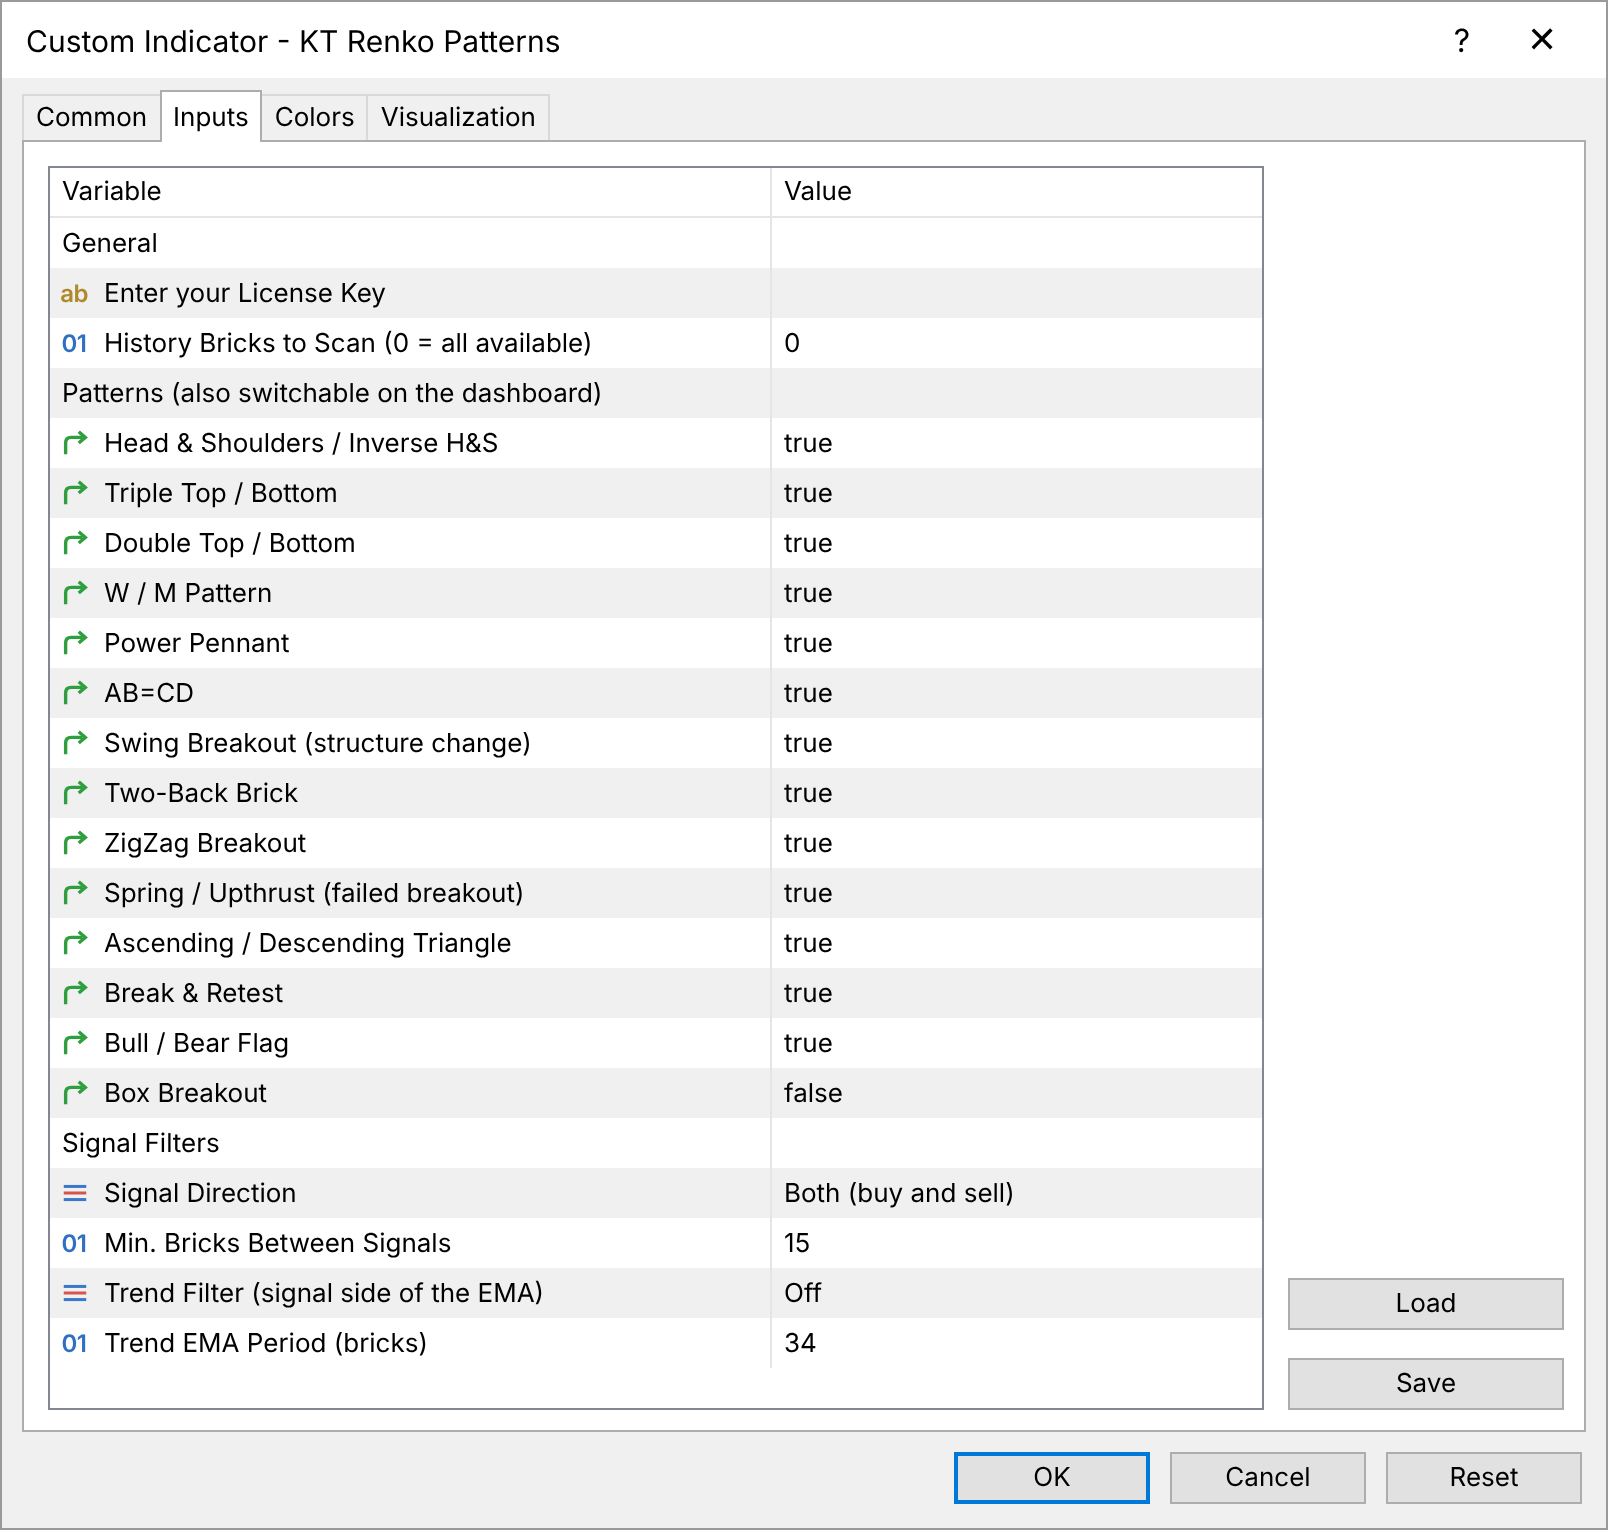
History Bricks to Scan
0 | How many bricks are scanned and included in the record. 0 uses the whole chart. |
Head & Shoulders ... Box Breakout
true (Box Breakout false) | Switches each of the 14 patterns on or off. The dashboard switches them too. |
Signal Direction
Both | Buy and sell signals, buy signals only, or sell signals only. |
Min. Bricks Between Signals
15 | The smallest gap between two signals. A larger number gives fewer signals. |
Trend Filter (signal side of the EMA)
Off | Keeps signals on the side of the trend EMA, for continuation patterns only or for all patterns. |
Trend EMA Period (bricks)
34 | The length of the trend EMA, counted in bricks. |
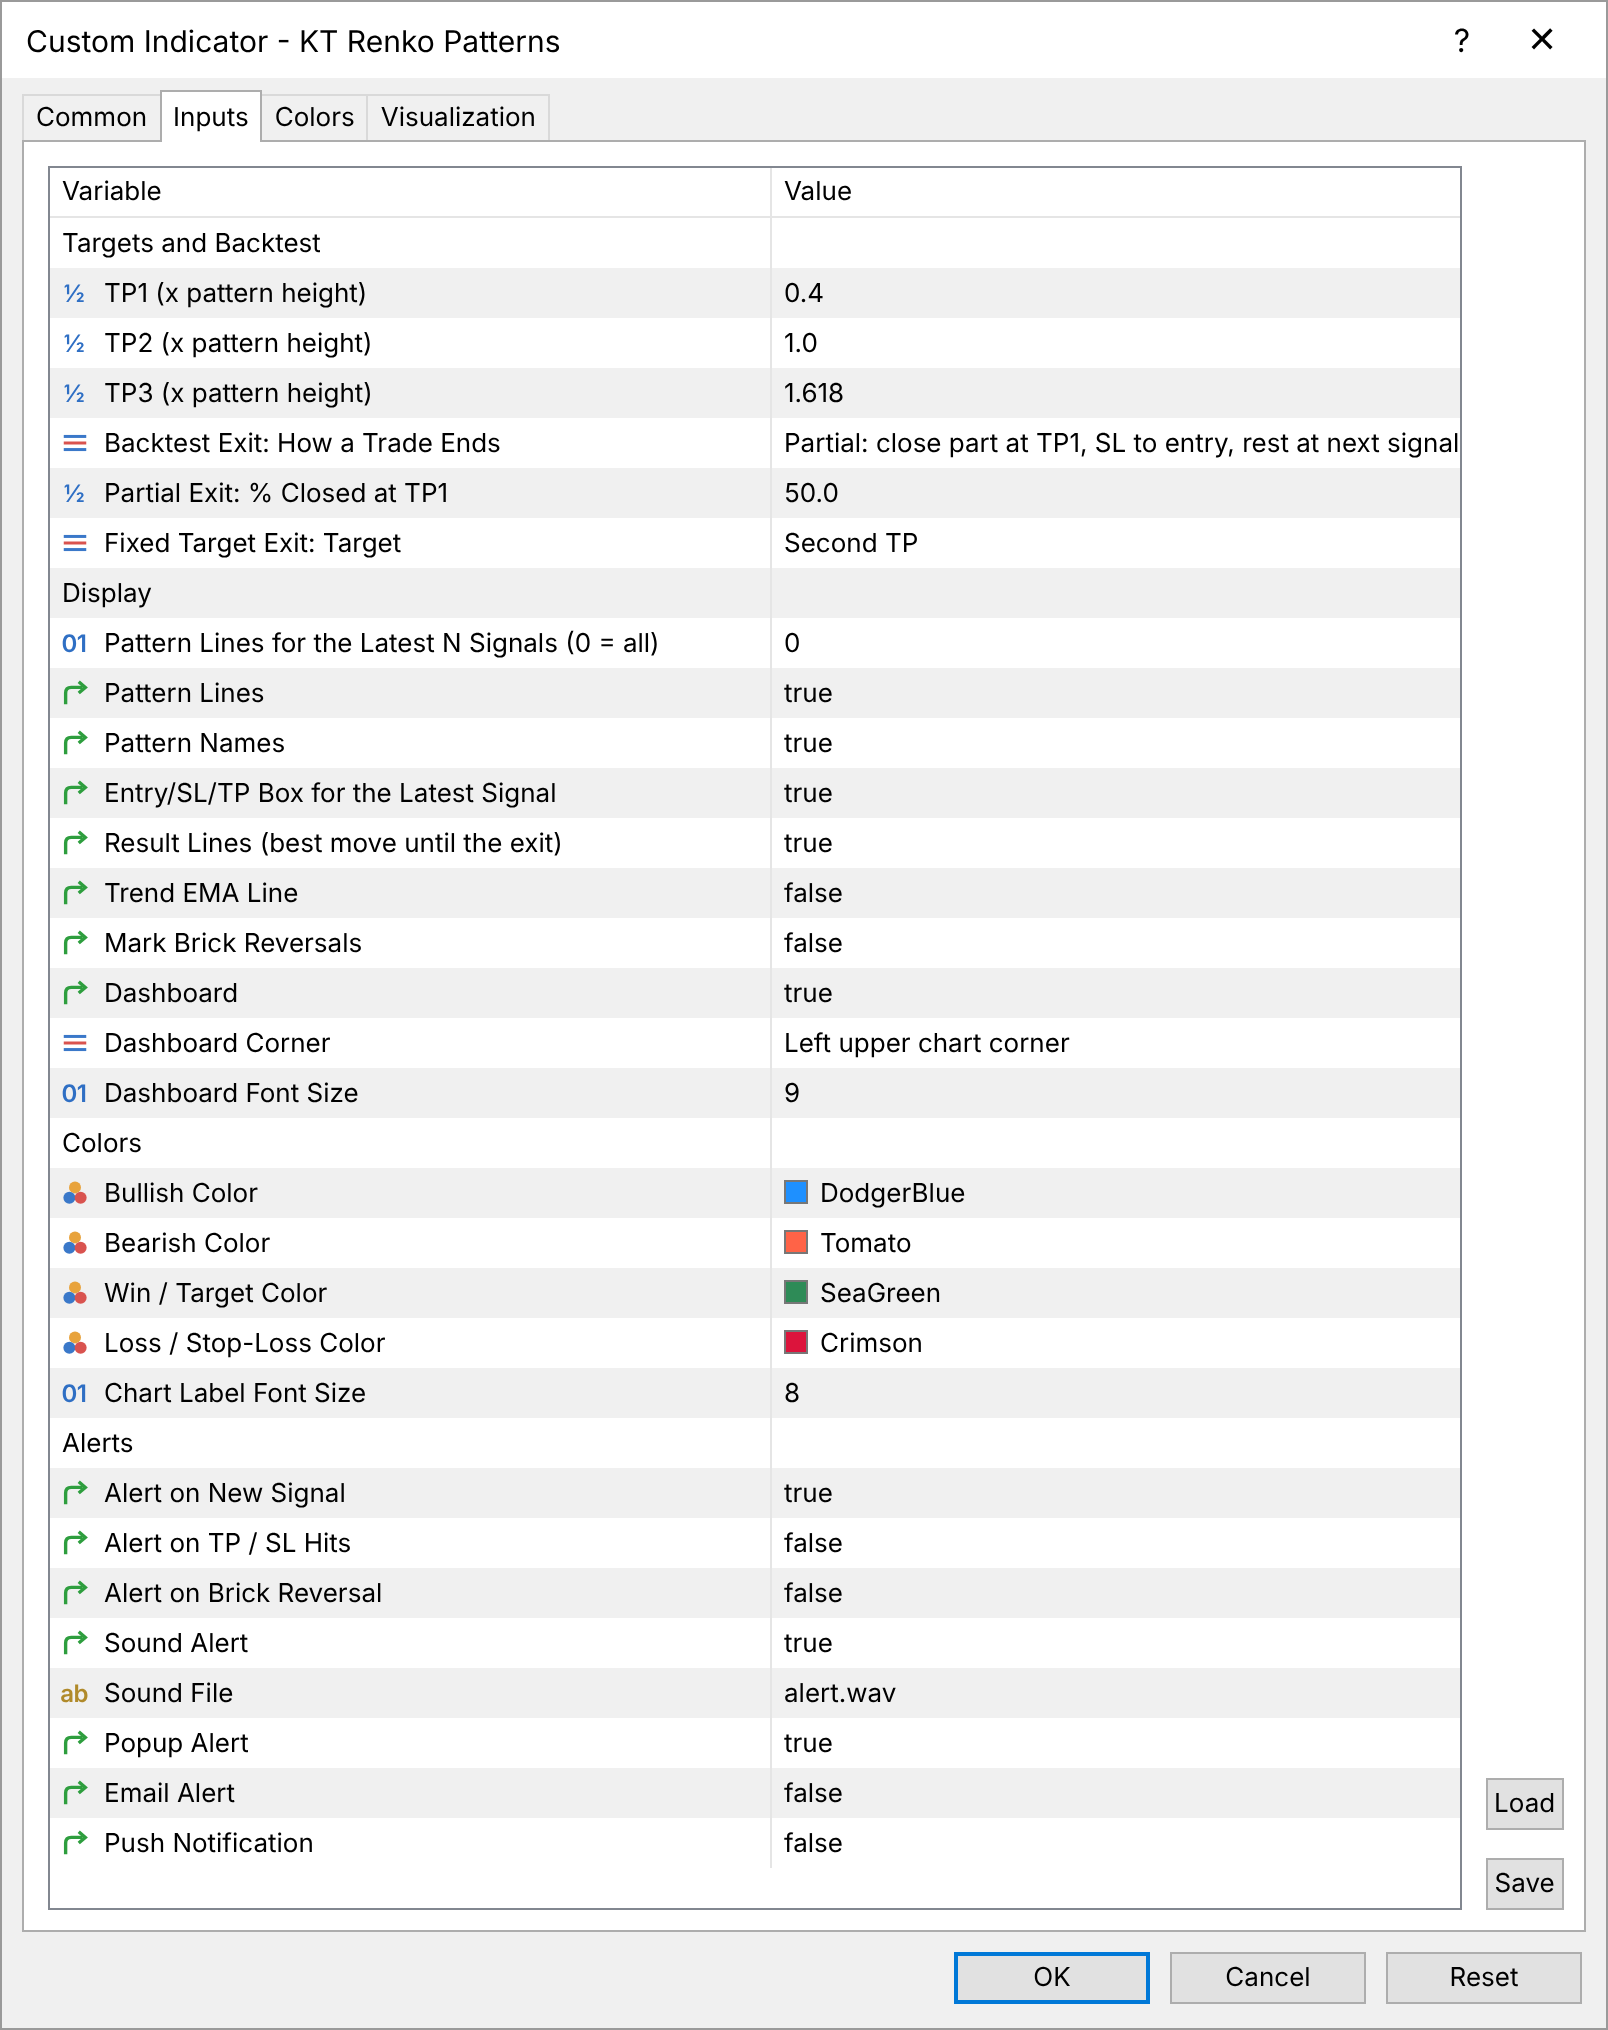
TP1, TP2, TP3 (x pattern height)
0.4, 1.0, 1.618 | How far each target sits from the entry, as a part of the pattern height. |
Backtest Exit: How a Trade Ends
Partial | How the record closes each trade: part at TP1 and the rest at the next signal, at the next signal, or at a fixed target. |
Entry/SL/TP Box for the Latest Signal
true | Shows the trade plan box on the latest signal. |
Dashboard
true | Shows the dashboard. Its corner and font size have their own inputs. |
Alert on TP / SL Hits
false | Adds an alert when a target or the stop loss is reached. |
Email Alert, Push Notification
false | Sends the signal alert to your email or phone. |
Pro Tip
Open the same symbol at two brick sizes, for example EURUSD at 5 pips and at 10 pips, and put the two dashboards side by side. Keep the brick size with the better average R, then switch off the patterns that show a negative average R on that chart.
Frequently Asked Questions
Do I need a special Renko chart? You need a Renko chart with bricks of equal size. The KT Renko Live Chart Generator makes one on MT4 and MT5, and the dashboard warns you when a chart is not Renko.
Does the indicator repaint? No. A signal is created only when a brick closes, and the brick that is still forming never creates one. Arrows, stops and targets stay where they were drawn.
Is the MT5 version the same as MT4? Yes. Both versions find the same 14 patterns and have the same dashboard, alerts and inputs.
Does it work on gold, indices and crypto? Yes. It works on any Renko chart your MetaTrader shows, and the dashboard gives results in pips on forex and in points on other symbols.
Can my EA trade the signals? Yes. Your EA can read every buy and sell signal with its entry, stop loss and three targets. The ready-made KT Renko Patterns EA trades them for you.
Pick Your Patterns by Their Record
If you want an indicator that only draws Renko bricks, a free one will do. If you want Renko patterns with a stop loss, three targets and the record of every pattern on your own chart, the KT Renko Patterns indicator is the one.













 Top top renko
 The perfect indicator
 Another outstanding product